How to Draw a Single Point Perspective Drawing
With Notability’s New Ruler Feature!
Whether you’re an architect, engineer, STEM student, or artist—we’ve heard your requests for a ruler feature inside Notability! We’re excited to announce that our latest release (version 11.1) introduces a Ruler as part of Notability Plus.
It’s now easier than ever to precisely measure and create straight lines (or erase clean edges)! To get you started, we’ve created a step-by-step tutorial on how to use the Ruler to create a single point perspective drawing.
What is a single point perspective drawing?
One point perspective is a drawing technique that creates an illusion of 3D space by using lines that recede back to a single vanishing point.
First, here’s how to use the Notability Ruler
- Introduce and dismiss the Ruler with a two finger hold or toggle it on/off from the View menu.
- Two finger tap on the compass to rotate by 90º counterclockwise.
- Two finger gesture to pinch and adjust the ruler.
- One finger moves the ruler.
- One finger double tap to quickly stamp a straight line. Use the blue anchors to measure or adjust them to change the width of your stamp.
- Hold down on a blue anchor (triangle) to show the preview line.
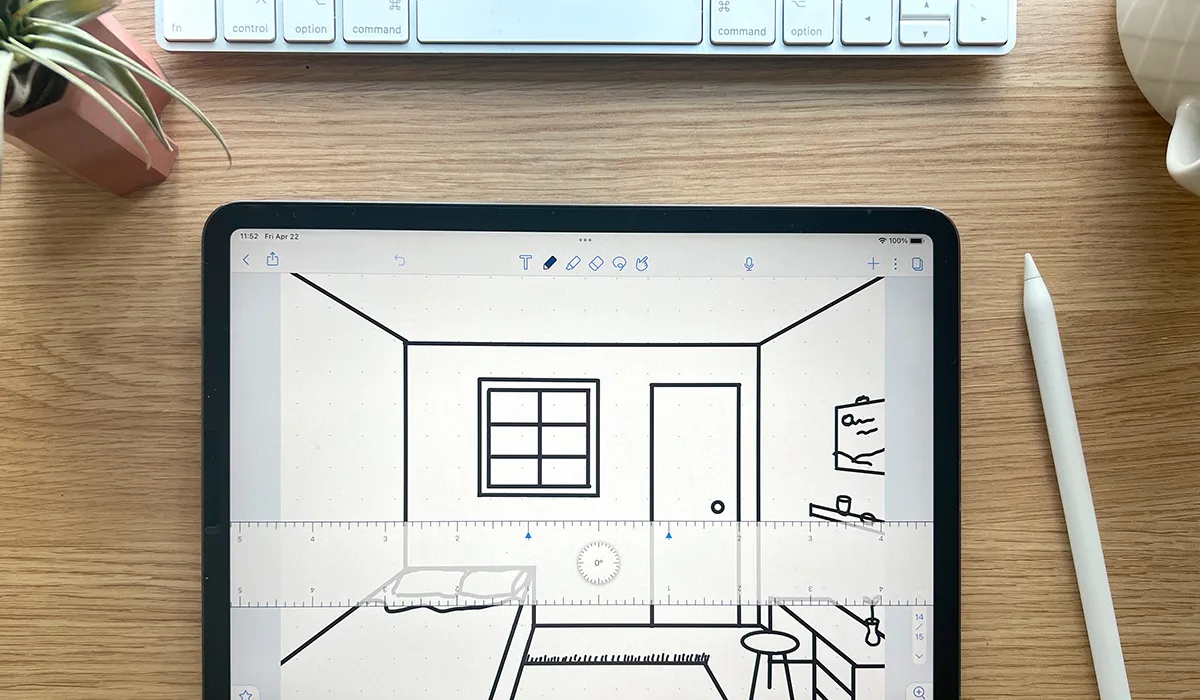
Now, onto the fun part! We are going to walk through how to draw a single point perspective drawing of your room or space!
Step 1
Let’s get set up! Open your Notability app and start a blank note. Hold with two fingers to introduce the Ruler (or you can access it from the View menu).
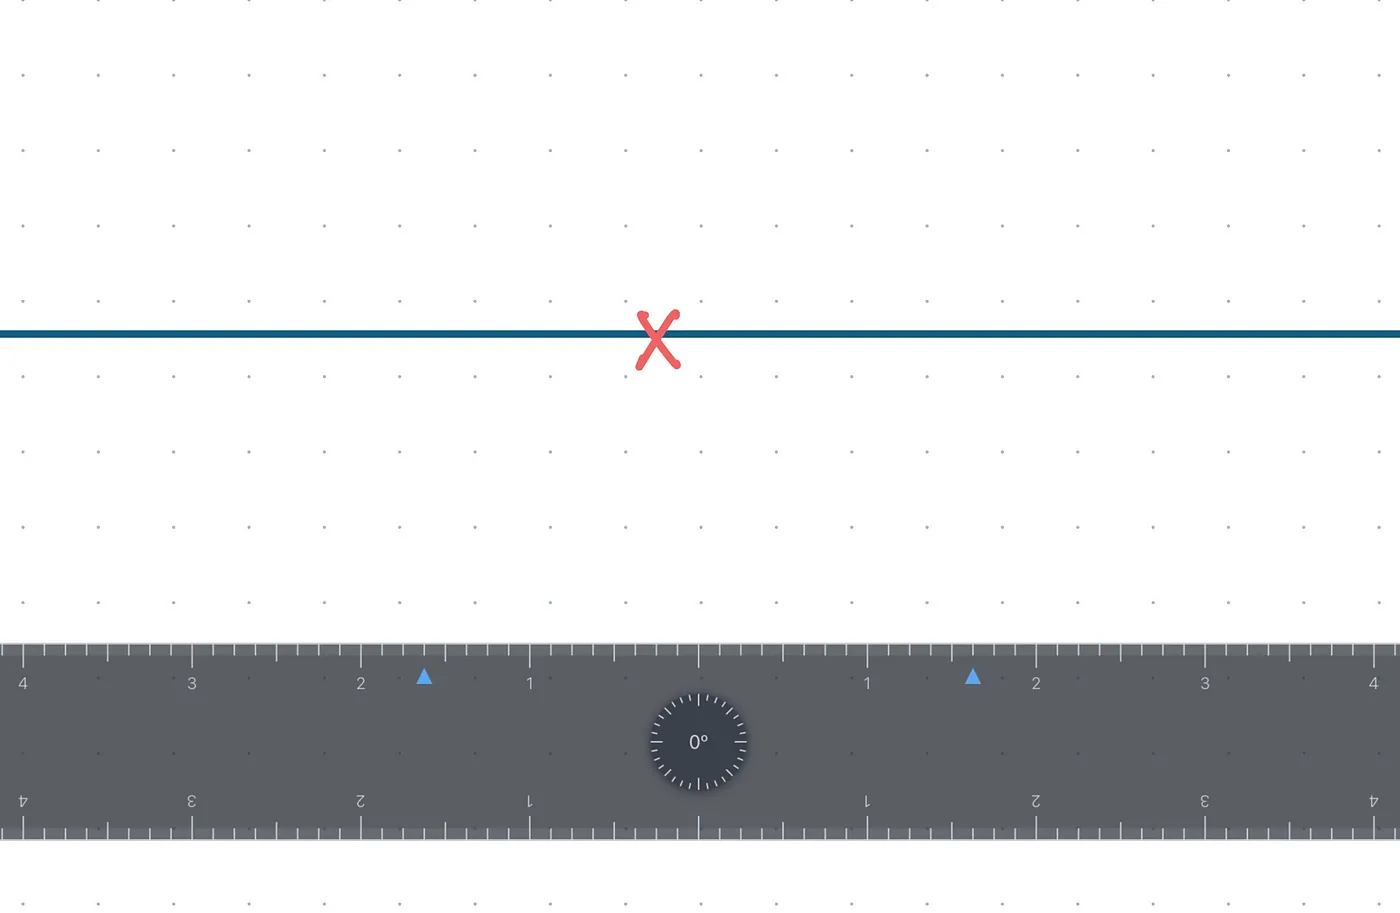
Step 2
Draw a horizontal line across your entire page using the Ruler (in a different color than your main drawing). This will be your horizon line, which determines from what height viewers are at!
Step 3
Mark your vanishing point on your horizon line (also in a different color than your main drawing). The vanishing point is the point on the wall that is directly in front of you. All of the perspective lines in your drawing will recede back to this singular dot.
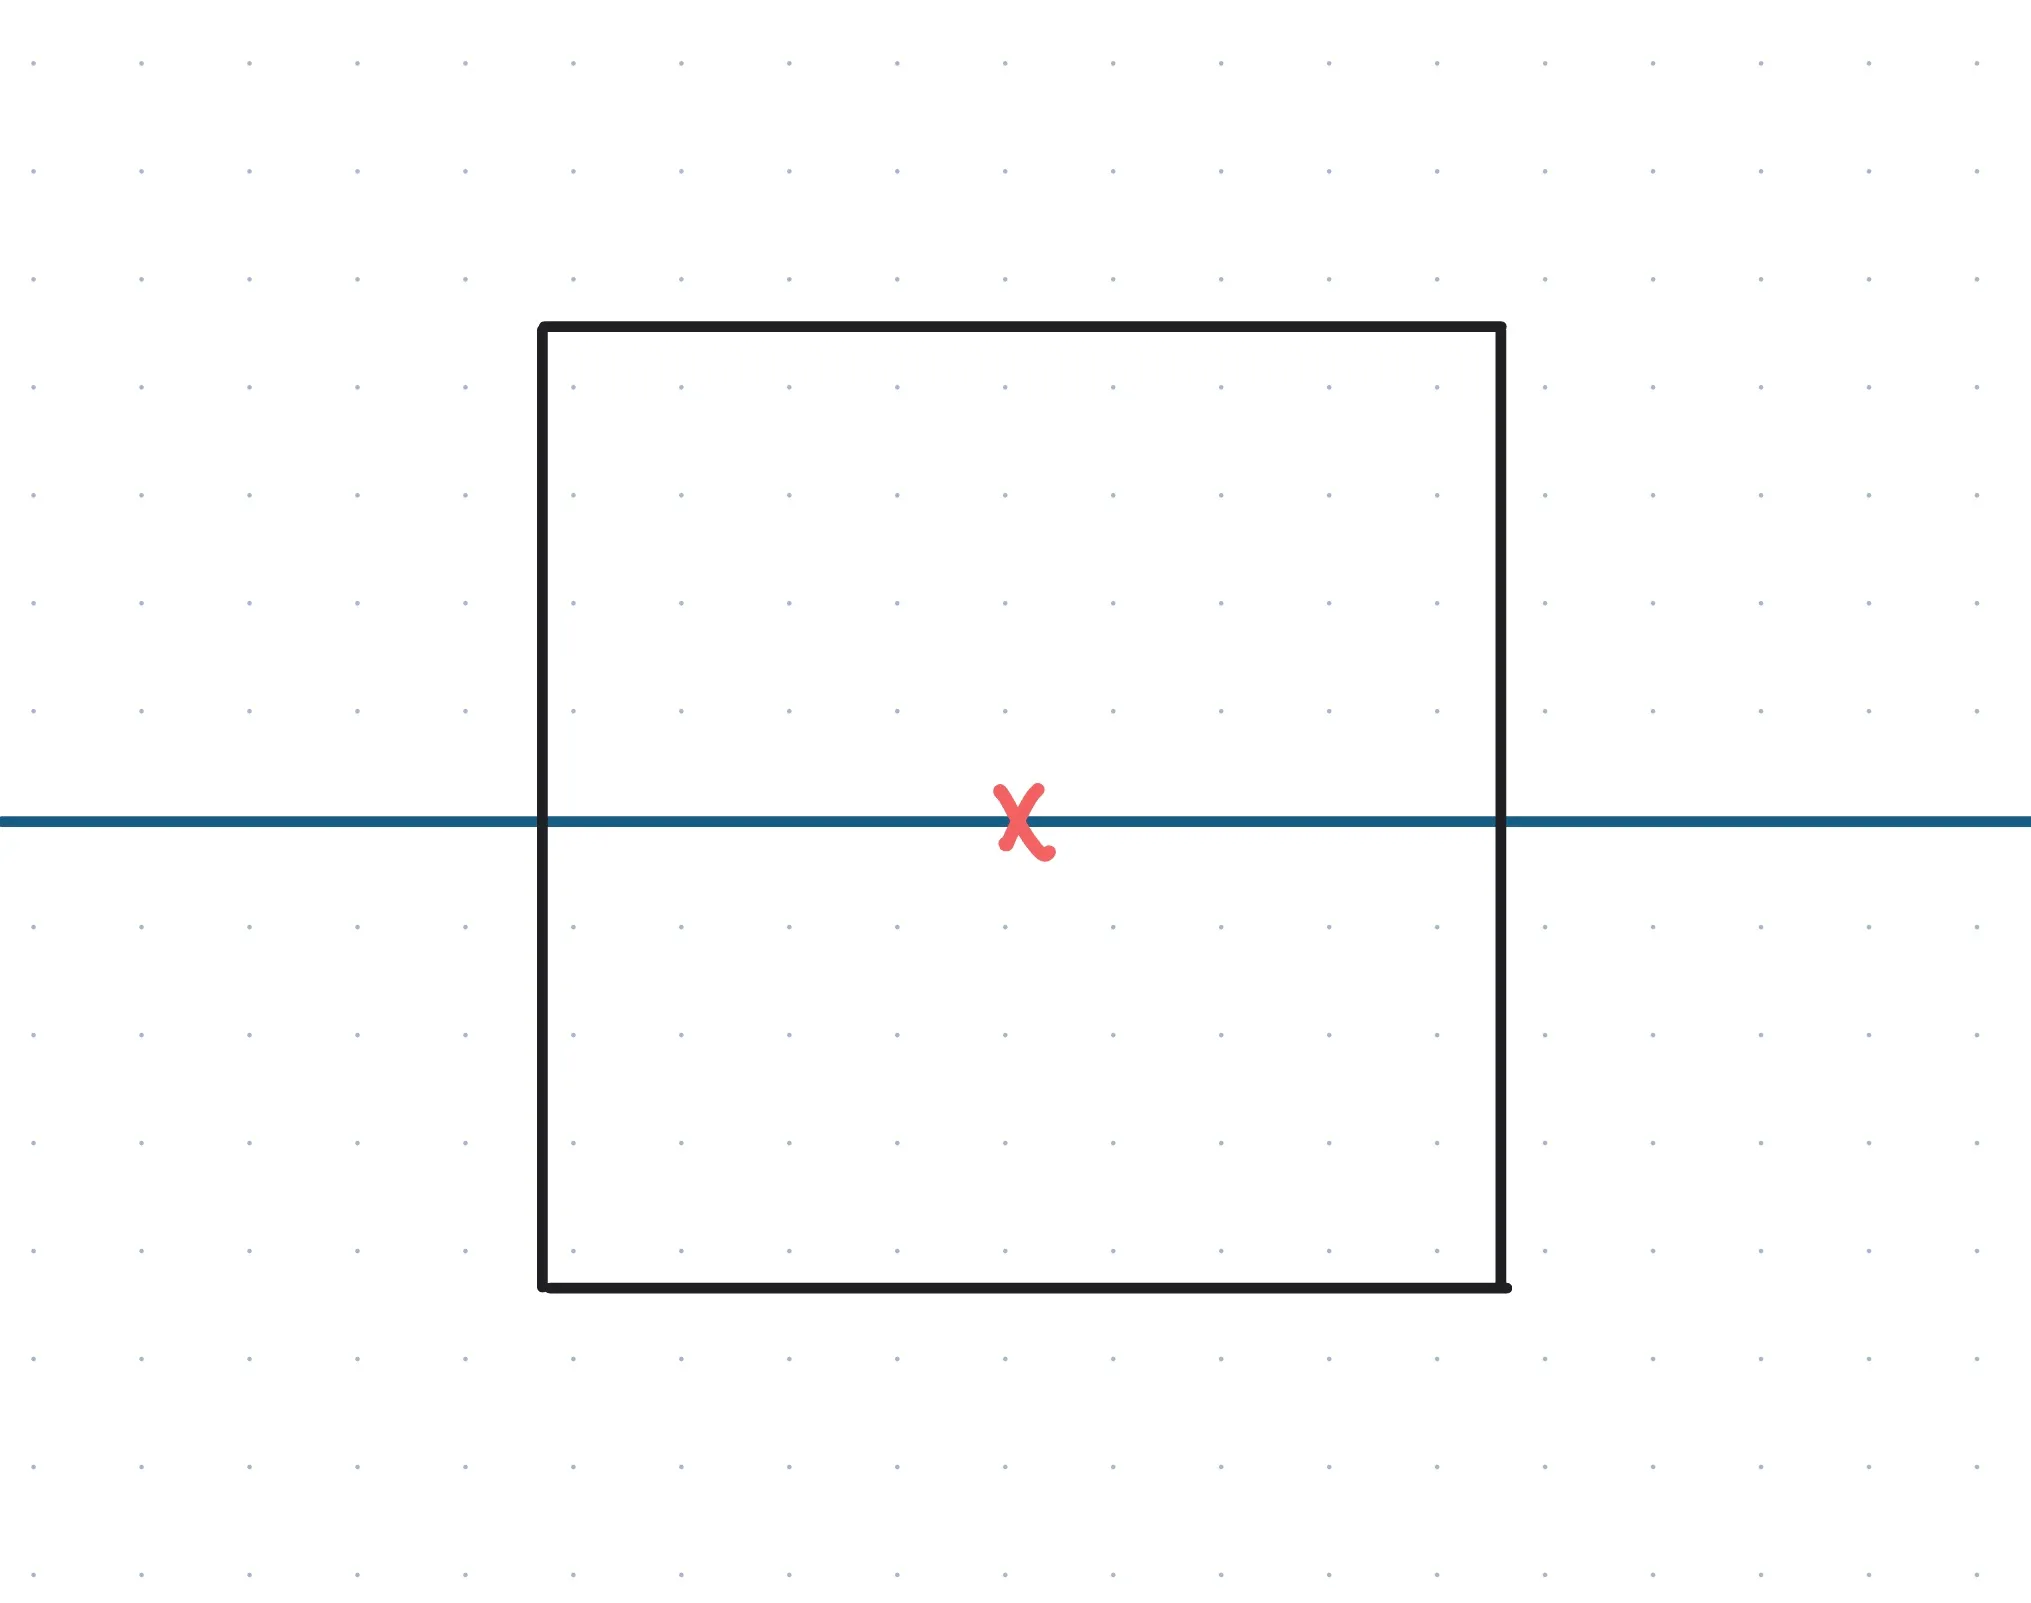
Step 4
Draw a rectangle around your vanishing point. This will become the wall facing across from you.
Ruler tip: when using the Ruler, double tap the center of the compass to jump to 90°.
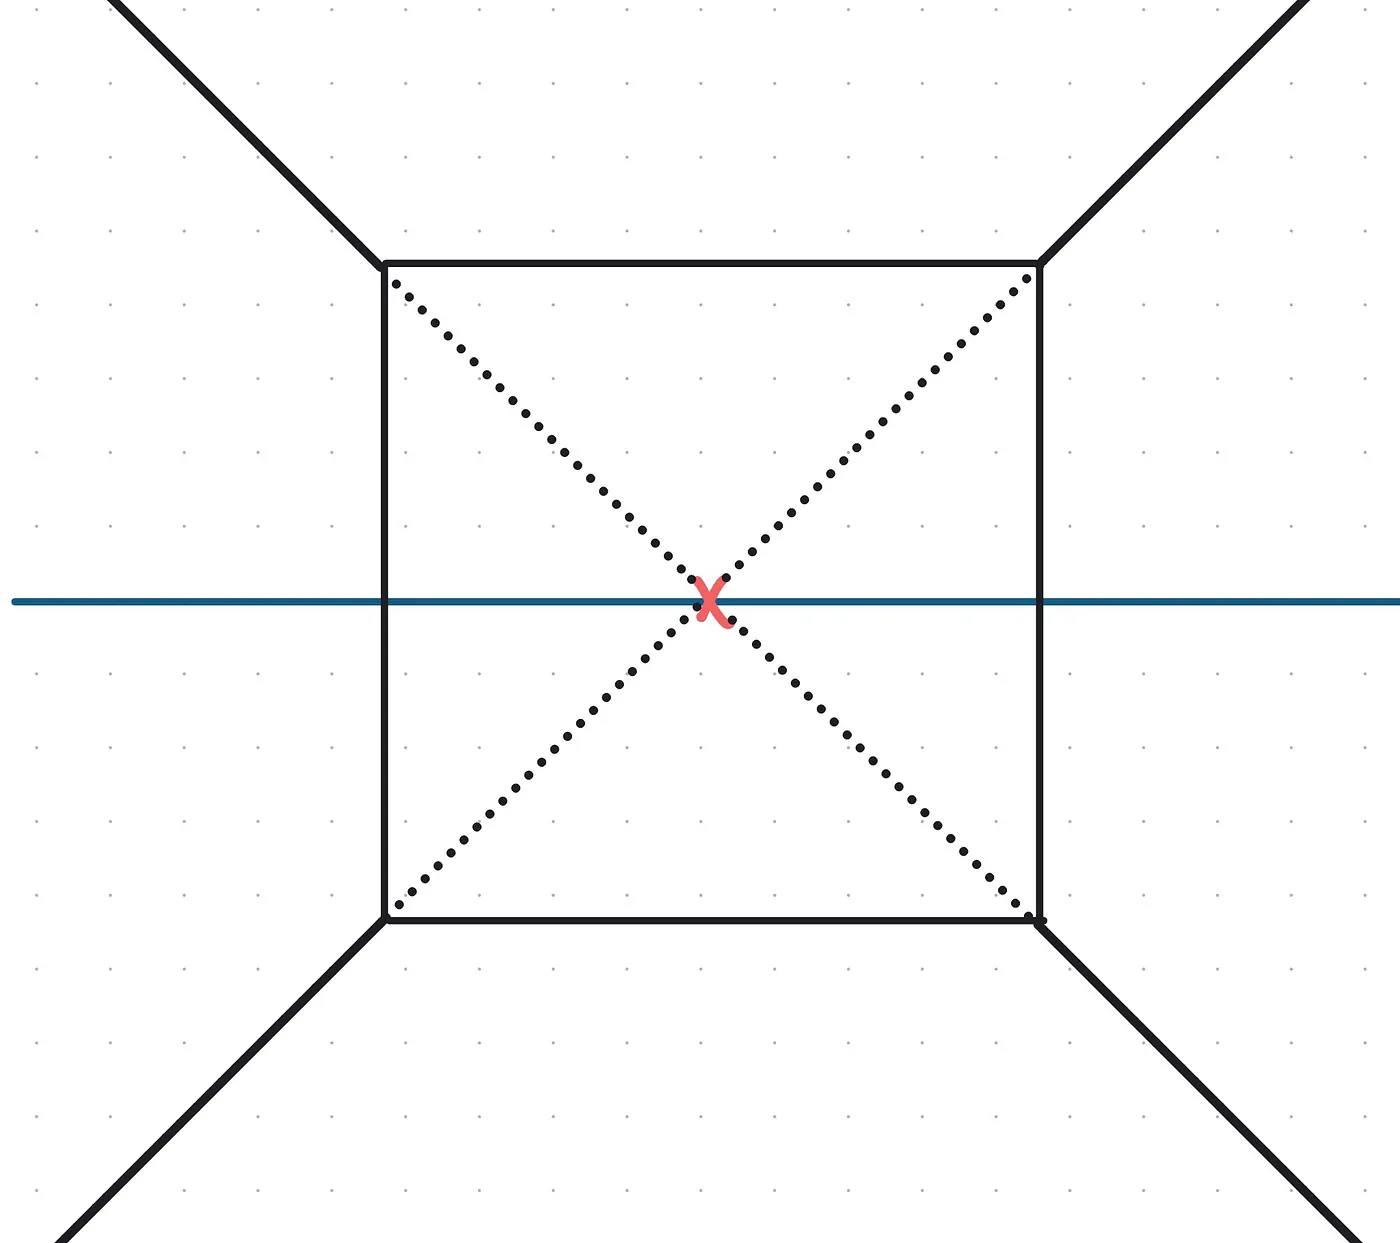
Step 5
Draw four lines away from your vanishing point that will make up the room’s side-walls. Use the dotted brush for the lines inside your rectangle and the solid brush to connect the lines from your rectangle to the edge of the paper. The dotted lines are just to show you that these perspective lines are indeed drawn to the vanishing point.
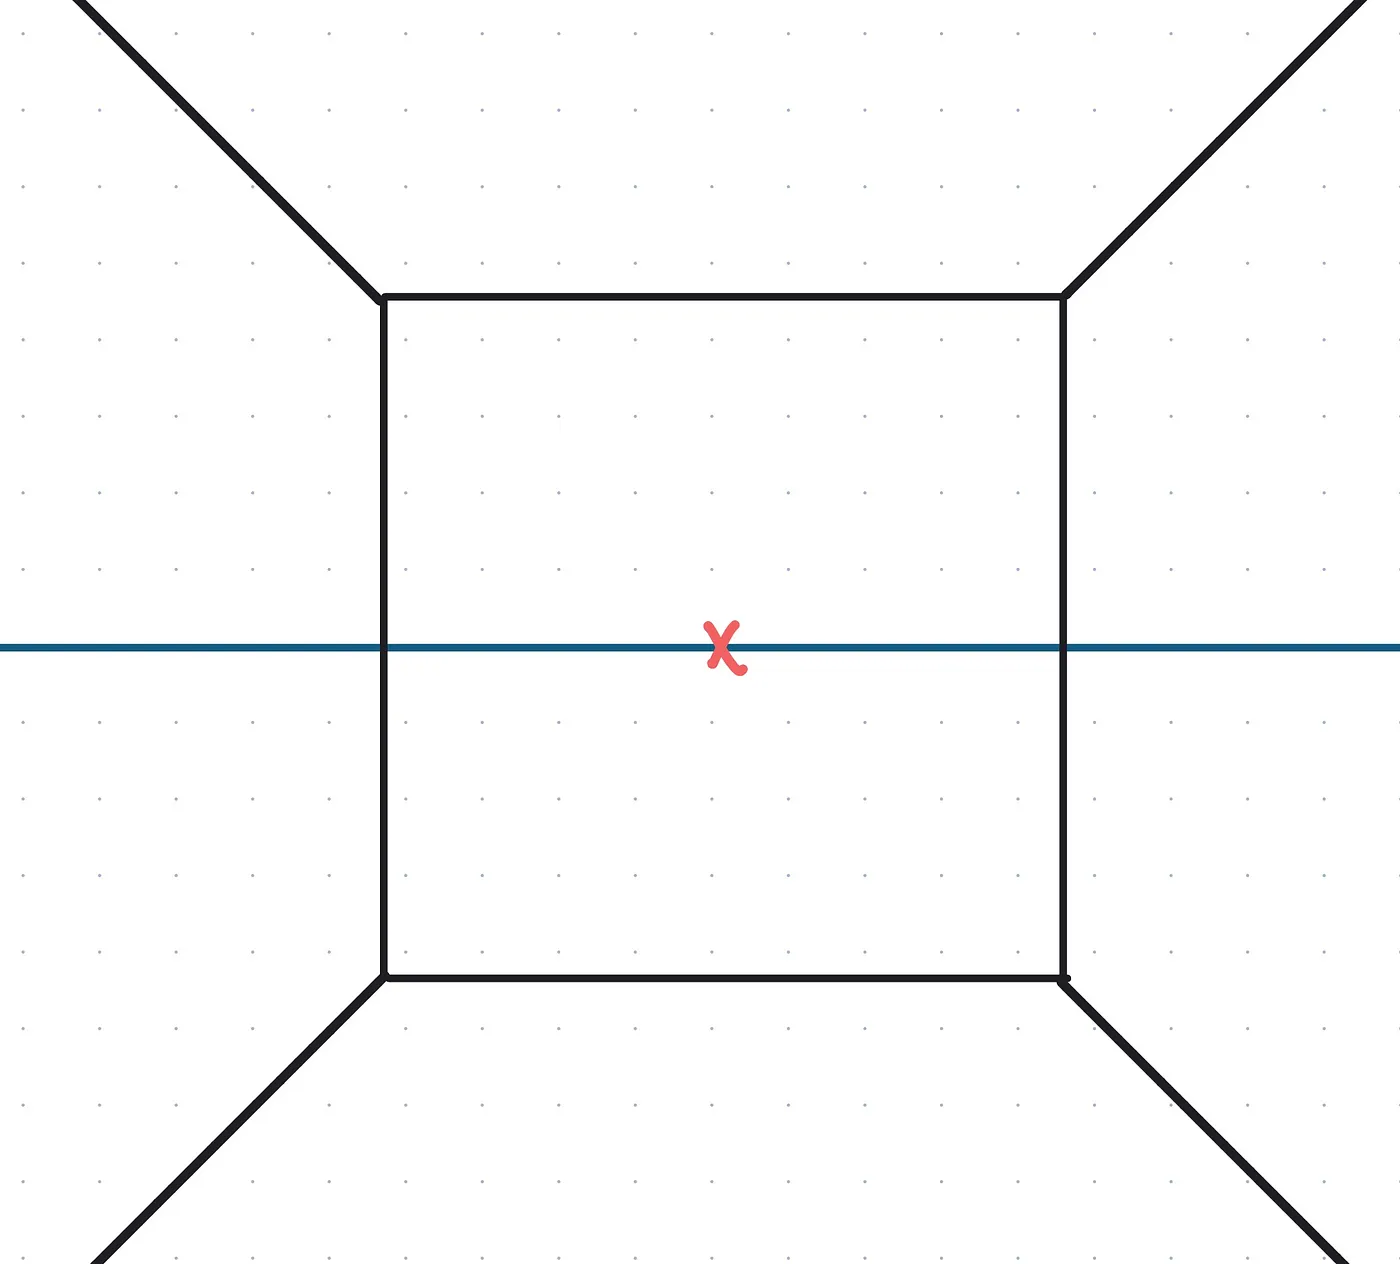
Step 6
Erase the dotted lines inside your rectangle.
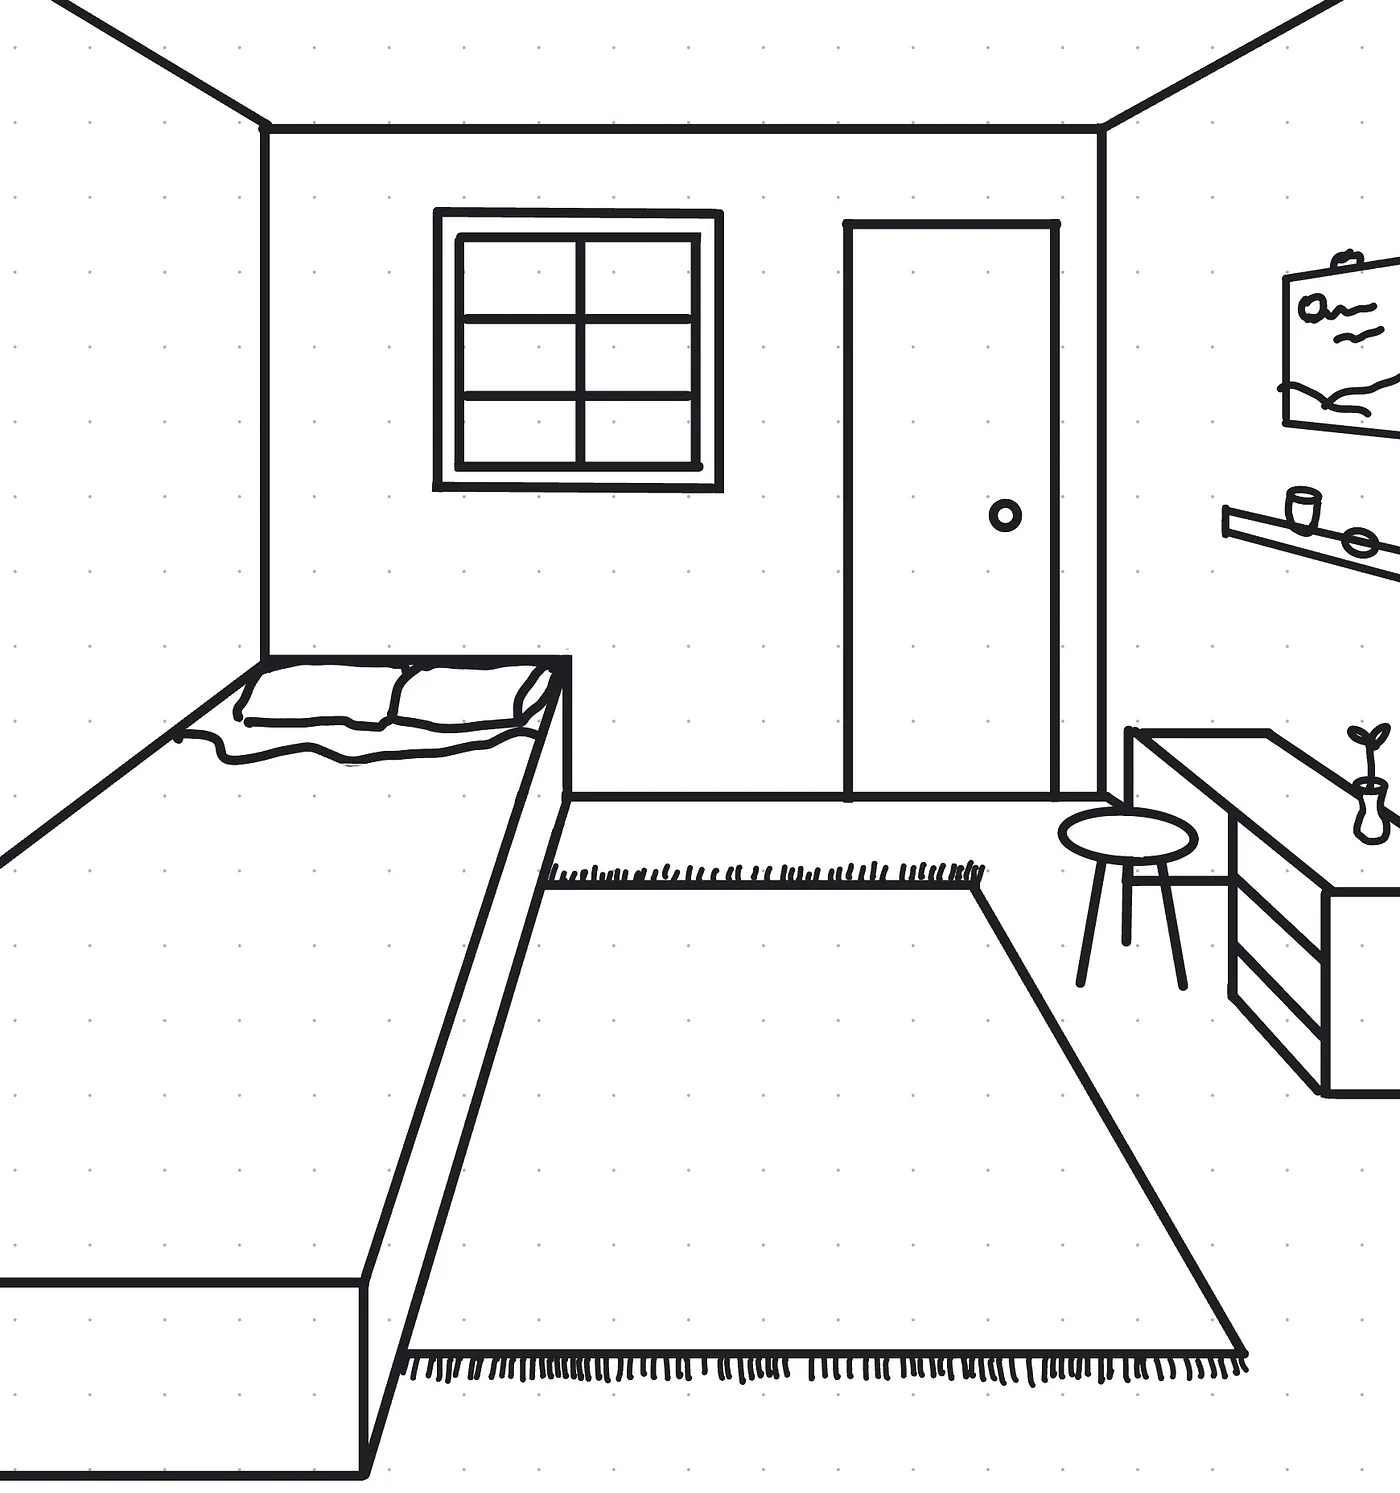
Step 7
Add details! Draw a rectangle inside the far facing wall that will become your door. Add a doorknob by drawing a circle—hold your stroke for a moment and watch as it snaps perfectly into shape.
Draw a desk along the side wall. Note: all perspective lines of objects on the side wall should direct to your vanishing point.
Ruler tip: use the partial eraser with the Ruler to clean up any edges.
Step 8
Draw your bed on the side wall. The bed, like your desk, is a box shape with side perspective lines angled toward the vanishing point.
Step 9
Add more details! Bring your drawing to life with some hand drawn elements that add a personal touch to your room. This could be plants, a rug, books, a poster or a bookshelf.

Step 10
Once you’re happy with your drawing you’ll erase your horizon line and vanishing point. Then wha-la! You are done!
If you want to expand your creativity and get access to more content — give Notability Plus a try! You will unlock the Ruler feature along with a plethora of hand crafted stickers, planners and more.